Setup a AltoroJ environment for Practicing Web Application Security (w/ Ubuntu18, JDK8, Tomcat7)
What is AltoroJ?
AltoroJ is a sample banking J2EE web application built by IBM AppSec team.It shows what happens when web applications are written with consideration of app functionality but not app security.
It is open-sourced, so everyone could download it to learn security issues & get a flavor of how to build a penetration testing lab : )
AltoroJ uses standard Java & JSP as its programming languages and it doesn't rely on additional frameworks which make people easier to understand the program directly. AltoroJ currently, being used to demonstrate application security vulnerabilities, educate people on how easy some of these issues could be exploited and how severe the impact may be.
*Github Project link: https://github.com/AppSecDev/AltoroJ/
*You could also enjoy the online version without suffering from installing the environment by http://altoromutual.com:8080/.
Steps to setup AltoroJ for our test environment & development:
1. Get a OS to run Eclipse & Tomcat (Here we use Ubuntu 18.04.2 with Virtualbox).
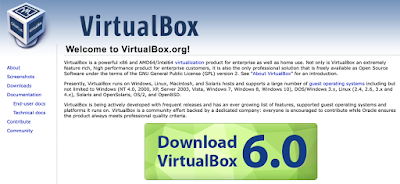
(a)Install your Virtual Box:Browse to https://www.virtualbox.org to download & install Virtualbox -
(b)Download Ubuntu 18.04 iso file:
Browse to https://www.ubuntu.com/download/desktop to download & install Ubuntu -
(c)Boot the VM from Ubuntu iso file and install:
Right click the VM we want to install Ubuntu -> Settings -> Storage -> Optical Drive -> Select the Ubuntu iso file downloaded.
Start the VM and follow the instruction to install Ubuntu.
2. Install Java JDK 8
From Ubuntu 11.x, SUN JDK is no longer included in Ubuntu Official PPA.As a result, we need to install SUN Java JDK 8 by manually download the JDK from Oracle website.
(a)Download the JDK 8
Go to https://www.oracle.com/technetwork/java/javase/downloads/jdk8-downloads-2133151.html & download "jdk-8u202-linux-x64.tar.gz".
(b)Extract the .tar.gz file
tar -zxvf jdk-8u202-linux-x64.tar.gz
After extraction, we will have a folder named jdk1.8.0_202.
(c)Move the extracted folder to /usr/lib/jvm
If you have never install a JVM, you will need to create a new folder as /usr/lib/jvm as I do.
sudo mkdir /usr/lib/jvm
sudo mv jdk1.8.0_202 /usr/lib/jvm
(d)Install & Configure Java
Run the following command to install -
sudo update-alternatives --install "/usr/bin/java" "java" "/usr/lib/jvm/jdk1.8.0_202/bin/java" 1
sudo update-alternatives --install "/usr/bin/javac" "javac" "/usr/lib/jvm/jdk1.8.0/bin/javac" 1
sudo update-alternatives --install "/usr/bin/javaws" "javaws" "/usr/lib/jvm/jdk1.8.0/bin/javaws" 1
Then, run the followings to config - (Note: if you have never install java as I do, then you could skip this command. Otherwise you will be prompted a dialog to select JAVA version you want to use.)
sudo update-alternatives --config java
(e)Test if the installation succeed
Run the following command -
java -version
Now, we finished the Java JDK installation!
3. Install Tomcat 7
(a)Go to Tomcat Official website - http://tomcat.apache.org/download-70.cgi.Then download 7.x .tar.gz file.
(b)Install Tomcat 7
Command:
Extract file -
sudo tar xzf apache-tomcat-7.0.93.tar.gz
sudo mv apache-tomcat-7.0.93 /opt/tomcat7
Set Environment Variables -
echo "export CATALINA_HOME="/opt/tomcat7"" >> ~/.bashrc
source ~/.bashrc
Start Tomcat Server -
cd /opt/tomcat7
sudo ./bin/startup.sh
(c)Verify the installation
Browse to http://127.0.0.1:8080
(d)Setup user accounts (if needed)
If we want to allow some users to access admin/manager pages, we need to edit conf/tomcat-users.xml file.
Command:
Edit conf/tomcat-users.xml -
sudo vim conf/tomcat-users.xml
Set users (put the followings inside
# user manager can access only manager section.
<role rolename="manager-gui">
<user password="_SECRET_PASSWORD_" roles="manager-gui" username="manager">
# user admin can access manager and admin section both.
<role rolename="admin-gui">
<user password="_SECRET_PASSWORD_" roles="manager-gui,admin-gui" username="admin">
</user></role>
(Here I make it to be commented out, because I don't want to allow the admin page.)
(e)Create Tomcat7 Init Script
Create a init file /etc/init.d/tomcat7 with the following contents:
----------------------------------------------------------------------
#!/bin/bash
### BEGIN INIT INFO
# Provides: tomcat7
# Required-Start: $network
# Required-Stop: $network
# Default-Start: 2 3 4 5
# Default-Stop: 0 1 6
# Short-Description: Start/Stop Tomcat server
### END INIT INFO
PATH=/sbin:/bin:/usr/sbin:/usr/bin
start() {
sh /opt/tomcat7/bin/startup.sh
}
stop() {
sh /opt/tomcat7/bin/shutdown.sh
}
case $1 in
start) start;;
stop) stop;;
restart) stop; start;;
*) echo "Run as $0 "; exit 1;;
esac
----------------------------------------------------------------------
Execute the following commands to set permission & symbolic link for init script -
chmod 755 /etc/init.d/tomcat7
update-rc.d tomcat7 defaults
4. Install Eclipse
(a)Download EclipseBrowse to https://www.eclipse.org/downloads/packages/release/2018-12/r
Download the Eclipse installer.
(b)Extract the .tar.gz file & install Eclipse
tar xvf eclipse-inst-linux64.tar.gz
cd eclipse-installer
./eclipse-inst
Follow the GUI to install the Eclipse IDE.
5. Install Gradle Buildship
(a)Open Eclipse (create a workspace if you don't have one)(b)Go to Help -> Eclipse Marketplace
(c)Search for Buildship
(d)Install Buildship Gradle Integration and restart Eclipse
6. Add Tomcat Server to Eclipse
(a)Open Servers view (Window -> Show View -> Other -> Servers)(b)Create a new Apache Tomcat v7.0 Server. (Tomcat installation directory is where you installed/extracted your Apache Tomcat instance)
p.s. You may need to chmod/chown the /opt/tomcat7 before adding the Server to allow eclipse to read the server configuration.
7. Pull down AltoroJ from GitHub
(a)Go to File -> Import -> Git -> Projects from Git(b)Choose "Clone URI" and use the following URI on the next screen: https://github.com/AppSecDev/AltoroJ/
(c)Proceed through the wizard without making any changes until you get to Wizard for Project import. At this point, choose to "Import existing Eclipse projects" and then continue through and finish the wizard
8. Run the AltoroJ on Tomcat7
Eclipse -> Run As... -> Run on ServerYou could also use your own browser & Connect to http://
Enjoy hacking : )
Reference:
https://www.arthurtoday.com/2012/05/ubuntu-11-oracle-sun-jdk-6.html
askubuntu.com -
https://askubuntu.com/questions/1058283/is-there-a-way-i-can-install-tomcat7-on-ubuntu-18-04
https://askubuntu.com/questions/56104/how-can-i-install-sun-oracles-proprietary-java-jdk-6-7-8-or-jre
TechAdmin.net -
https://tecadmin.net/install-tomcat-7-on-ubuntu/
Trouble Shooting:
https://stackoverflow.com/questions/19900359/tomcat-server-installation-error-in-eclipse
*p.s. Please set the permission carefully :P
If you see the target runtime Apache Tomcat v7.0 is not defined -
https://stackoverflow.com/questions/37698738/eclipse-target-runtime-apache-tomcat-v7-0-is-not-defined


留言
張貼留言
Welcome to share your comments or questions : -)
Enjoy life!